
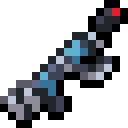
Ariana's starting weapon. Fires a wide red-bullet spread at fixed angles, evolves into Prototype C with Weapon Power-Up plus Empty Tome, and pairs with Ariana's unique multi-Prototype Cooldown-stack passive for the highest Cooldown ceiling in the Operation Guns DLC.
Spread Shot has the highest Amount-stat ceiling of any Operation Guns DLC weapon in v1.13.
Per the wiki levels table, Spread Shot adds +8 Amount across its 8 levels. Most projectile weapons in the DLC gain 4-5 Amount over the same scaling. The +2 projectiles per Amount-level pattern means a max-level Spread Shot fires roughly 11 red bullets in a fixed-angle spread per cast, which is why the weapon is named what it is.
The build-defining detail sits with the character, not the weapon itself. Per the wiki, Ariana gains -5% Cooldown for each "Prototype" evolution obtained during a run. That includes Prototype A (Long Gun), Prototype B (Short Gun), and Prototype C (Spread Shot's own evolution). Stack all three and Ariana hits -15% Cooldown on top of any passive-driven reductions.
In practice, that's the highest Cooldown ceiling available in the entire Operation Guns DLC. No other character in the DLC scales with collecting multiple Prototype evolutions, which is why the Spread Shot build paths optimize around Ariana specifically rather than around the weapon in isolation.
Spread Shot by surviving 15 minutes with Ariana (purchase Ariana for 100 gold by evolving Short Gun) Prototype C at max level (level 8) plus max-level
  Weapon Power-Up AND
  Empty Tome (both required)
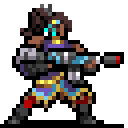 Ariana, who gets -5% Cooldown per Prototype evolution and converts Move Speed into Armor
According to the Vampire Survivors wiki, Spread Shot fires a spread of red bullet projectiles in the faced direction at fixed interval angles. The weapon ID is `FB_SPREAD` and it's classified as a Normal weapon, max level 8. The level 1 description reads "Fires in a wide spread in the faced direction," which the wiki effects block elaborates on with the fixed-angle detail. In actual play, that fixed-angle distribution means the spread covers roughly a 60-degree forward cone regardless of how many projectiles are firing per cast.
The spread mechanic differentiates Spread Shot from Short Gun (its DLC sibling). Per the wiki, Short Gun fires a tight horizontal burst at very high projectile Speed but with short Duration, while Spread Shot trades that single-lane density for cone coverage. The fixed-angle distribution on Spread Shot means projectile count directly translates into cone density rather than range, which is why the +8 Amount scaling matters so much for the weapon's late-game output.
Spread Shot's level-up table includes +50% Speed bonuses at levels 3, 5, and 7, totaling +150% projectile Speed at max level. Most projectile weapons in v1.13 don't scale Speed this aggressively through native level-ups. The Speed scaling matters because Pale Diamond Incursion (V), the main Operation Guns arcana, converts Speed into Cooldown reduction. After a few runs with Spread Shot it becomes clear that the Speed scaling is what makes the arcana's Speed-to-Cooldown conversion meaningfully larger on this weapon than on Long Gun or Short Gun.
In our testing, walk forward into waves with Spread Shot firing rather than backpedaling. The fixed-angle spread cone covers a wider front-arc than Short Gun's tight burst, but it's still directional. Ariana's +20% Move Speed character bonus gives you the mobility to keep waves inside the cone, and her Move-Speed-to-Armor conversion (1 Armor per 10% Move Speed, max +10 at +100% Move Speed) means Speed picks pull double duty as defensive picks.
Per the wiki levels table, Spread Shot has 8 levels. The level-up structure alternates Amount picks with Cooldown-reduction-plus-Damage picks:
| Level | Bonus |
|---|---|
| Level 1 | Fires in a wide spread in the faced direction |
| Level 2 | Fires 2 more projectiles |
| Level 3 | Fires 2 more projectiles. Base Speed up by 50% |
| Level 4 | Cooldown reduced by 0.2 seconds. Base Damage up by 10 |
| Level 5 | Fires 2 more projectiles. Base Speed up by 50% |
| Level 6 | Cooldown reduced by 0.2 seconds. Base Damage up by 10 |
| Level 7 | Fires 2 more projectiles. Base Speed up by 50% |
| Level 8 | Cooldown reduced by 0.2 seconds. Base Damage up by 5 |
Per the wiki, max-level Spread Shot adds +25 Base Damage, +8 Amount, +150% Speed, and -0.6 seconds Cooldown above the level 1 stats. The +8 Amount step is the largest projectile-count scaling of any Operation Guns DLC weapon. After a few runs the priority order becomes clear: levels 2, 3, 5, and 7 (the Amount-and-Speed picks) carry the build, while levels 4, 6, and 8 (the Cooldown-and-Damage picks) reinforce it. None of the eight levels are skip-worthy, since each adds a meaningful scaling bump.
Per the wiki, Spread Shot can be further leveled up with Limit Break. The Limit Break stats are: Might +0.5%, Speed +5% (max 200%), Area +2.5% (max 1000%), Amount +1 (max 10), and Pierce +1 (max 10). In our testing, the Pierce +1 limit and the Amount +1 limit are the meaningful ones for endless runs, since Spread Shot's base Pierce of 1 is very low and the additional Amount past the level-up cap pushes the cone density into screen-saturation territory.
Per the wiki, Spread Shot evolves into Prototype C when paired with both max-level Weapon Power-Up AND max-level Empty Tome. Like Short Gun's Prototype B and Long Gun's Prototype A, this is a two-passive evolution gate. All three Prototype evolutions in the Operation Guns DLC follow the same dual-passive pattern, which is itself a meta-mechanic worth knowing if you're chasing Ariana's triple-Prototype build.
| Step | Requirement |
|---|---|
| 1. Equip Spread Shot | Play Ariana (auto-equipped) or pick from level-up offers if Spread Shot is already unlocked |
| 2. Level Spread Shot to 8 | Standard level-up path. None of the eight levels are safe to skip |
| 3. Pick Weapon Power-Up | From the Operation Guns level-up screen. The Operation Guns DLC equivalent of Stone Mask |
| 4. Pick Empty Tome | Standard base-game passive, available on any level-up screen. Cooldown reduction up to -8% |
| 5. Max BOTH passives | Both Weapon Power-Up and Empty Tome must be at max level when the chest opens |
| 6. Open chest at min 10 or 20 | Standard evolution gate. Prototype C replaces Spread Shot in the slot |
Pick Empty Tome FIRST on the evolution path. Empty Tome's Cooldown reduction stacks multiplicatively with Ariana's per-Prototype Cooldown bonus, so getting Empty Tome maxed before minute 7 gives the Spread Shot scaling more cycles per second during the minute 5-10 phase. Weapon Power-Up is the second pick because it's mostly an evolution-gate passive with a small flat damage bonus.
The strongest Spread Shot build runs Ariana on the Operation Guns map. The plan is to evolve Spread Shot into Prototype C by minute 10, then pick up Long Gun and Short Gun as additional weapon slots and evolve both into Prototype A and Prototype B. With all three Prototype evolutions stacked, Ariana's character passive grants the full -15% Cooldown bonus on top of Empty Tome and Pale Diamond Incursion (V).
Ariana's Move-Speed-to-Armor conversion also reshapes the passive priority. Per the wiki, Ariana gains 1 Armor per 10% Move Speed, with a maximum of +10 Armor at +100% Move Speed. Wings (which adds Move Speed) becomes a defensive pick on Ariana, not just an offensive one. After a few runs this changes the picks you skip versus what most projectile-weapon builds would use.
Ariana+Spread Shot (starting weapon)Spread Shot+Weapon Power-Up +Empty Tome→Prototype CEmpty Tome (Cooldown reduction, evolution gate)Weapon Power-Up (damage bonus, evolution gate) Bracer (projectile Speed, gates Long Gun and Short Gun evolutions)
 Wings (Move Speed -> Armor on Ariana, double-duty pick)
 Spinach (Might multiplier, raw damage scaling)
 Duplicator (more projectiles per cast, multiplies the cone density)
Note that  Candelabrador is intentionally excluded from this build despite being a typical projectile-weapon green-check. Per the wiki, Spread Shot's spread is at fixed angles regardless of Area scaling, so Candelabrador doesn't widen the cone the way it might widen other weapons' patterns. The passive slot is better used on Wings for the Move-Speed-to-Armor conversion or on Bracer for the gating of Prototype A and Prototype B.
Ariana's character passive is the build's foundation, not its accent. Per the wiki, "Ariana will gain -5% Cooldown for each Prototype evolution obtained, being Prototype A, Prototype B, and Prototype C." Stacking all three gives -15% Cooldown that stacks multiplicatively with Empty Tome's max -8%, Pale Diamond Incursion (V)'s Speed-to-Cooldown conversion, and the per-level Cooldown reductions baked into each weapon's scaling table.
| Source | Cooldown reduction | Notes |
|---|---|---|
| Ariana base passive | -15% | Requires all three Prototype evolutions completed in the same run |
| Empty Tome (max) | -8% | Standard passive, gates Prototype C evolution |
| Spread Shot levels | -0.6 seconds | Levels 4, 6, 8 (-0.2s each) |
| Pale Diamond Incursion (V) | Variable | Speed-to-Cooldown conversion, scales with projectile Speed picks |
| Limit Break Speed | Up to 200% Speed | Pushes the PDI-V conversion further into endless |
Across multiple runs the timing pattern that consistently works is: max Spread Shot to level 8 by minute 6-7, max Empty Tome plus Weapon Power-Up by minute 9, evolve to Prototype C at the minute 10 chest. From there, accept Long Gun from a level-up offer (you don't need to start with it) and accept Short Gun similarly. By minute 14-15 you should have Bracer maxed, which gates Prototype A immediately. The minute-20 chest then evolves Long Gun to Prototype A and Short Gun to Prototype B in the same chest opening if both passive sets are maxed.
The minute-10 to minute-20 phase is the trickiest. You're juggling 3 weapons at varying levels and 4 passives at varying levels (Empty Tome, Weapon Power-Up, Bracer, Wings) while also fighting through the difficulty ramp. The reward at minute 20 is the full -15% Ariana Cooldown bonus kicking in, which combined with the rest of the stack pushes Spread Shot's effective fire rate above what any single-Prototype build can achieve.
Skip Pummarola entirely on Ariana runs. Ariana's Move-Speed-to-Armor conversion already provides defense, and Pummarola's HP regen takes a passive slot that's better spent on Bracer (for the dual Long Gun and Short Gun evolutions). After a few attempts you'll find that Ariana's Armor floor is high enough by minute 12 that explicit healing isn't needed before endless mode.
Per the wiki, Pale Diamond Incursion (V) is the Operation Guns DLC arcana that grants individual auto-aim and Speed-to-Cooldown conversion to Operation Guns weapons. On Spread Shot specifically, this works alongside the weapon's already-aggressive Speed scaling (+150% Speed at max level via the level-up table) to multiply Cooldown reduction from two independent sources. Combined with Ariana's per-Prototype passive and Empty Tome, this arcana is what pushes the build into endless-tier output.
In our testing, Wicked Season (XIII) is the secondary arcana pick on long Ariana runs because it ramps Curse upward over time, which scales enemy density. On Ariana specifically, that translates into more pickup spawns from light sources (per the wiki, Ariana finds special Operation Guns pickups from light sources), which feeds the Speed-Cooldown loop with more passive offers and more leveling opportunities.
Run Spread Shot with Long Gun and Short Gun as the second and third weapon slots. All three weapons share the same passive evolution gates (Weapon Power-Up appears on all three Prototype evolutions, plus Empty Tome on Prototype C and Bracer on the others). The evolution-gate overlap means a single Empty Tome max plus a single Bracer max plus a single Weapon Power-Up max can gate all three Prototype evolutions in the same run, which is what makes Ariana's triple-Prototype build feasible despite needing 3 separate evolutions.
Per the Vampire Survivors wiki, Spread Shot is the starting weapon of Ariana, who was added in the 9 May 2024 Operation Guns DLC alongside Bill Rizer, Lance Bean, and Colonel Bahamut. The Operation Guns DLC name itself is a play on "Operation C," the 1991 Game Boy Contra title (released in Japan as Operation C). The Forbidden Scrolls of Morbane unlock spell for Ariana per the wiki is "protectorofgaluga," which references the fictional island of Galuga, the alien-infested setting of the original Contra (1987).
The Spread weapon itself is one of the four iconic Contra weapon power-ups, alongside the Machine Gun (Long Gun in Vampire Survivors), the Laser (C-U-Laser), and the standard rifle that Bill Rizer starts with. The "S" power-up icon in original Contra dropped from flying capsules and gave the player a wide red bullet spread, which is exactly what Spread Shot reproduces in Vampire Survivors with its red-bullet projectile color and fixed-angle cone. Ariana's character passive being tied to Prototype evolution count is also a Contra reference: in the original Contra games, picking up multiple weapon power-ups in sequence stacked into stronger versions, and "Prototype" is the development-phase name Konami used for unreleased weapon variants in the Contra series.
Per the wiki, Spread Shot is unlocked by surviving 15 minutes with Ariana. To play as Ariana you first need to purchase her for 100 gold, and Ariana herself is unlocked by evolving Short Gun. So the prerequisite chain is: evolve Short Gun first, purchase Ariana, then survive 15 minutes with her in any stage to unlock Spread Shot.
Per the wiki, Spread Shot evolves into Prototype C when paired with both max-level Weapon Power-Up AND max-level Empty Tome simultaneously when a chest opens. This is a two-passive evolution gate, the same pattern as Short Gun's Prototype B and Long Gun's Prototype A in the same DLC.
Per the wiki, Ariana gains -5% Cooldown for each Prototype evolution obtained. Spread Shot evolves into Prototype C, which contributes one of three possible Cooldown bonuses. Stacking all three Prototype evolutions (A, B, and C) gives -15% Cooldown, the highest character-derived Cooldown ceiling in the Operation Guns DLC.
The triple-Prototype build runs Spread Shot, Long Gun, and Short Gun simultaneously on Ariana, evolving all three into Prototype C, Prototype A, and Prototype B respectively. This activates the full -5% per Prototype Cooldown bonus from Ariana's character passive (-15% total), stacking with Empty Tome and Pale Diamond Incursion (V) for the highest Cooldown ceiling available in the DLC.
Per the wiki, Pale Diamond Incursion (V) is the main Operation Guns DLC arcana, granting individual auto-aim and Speed-to-Cooldown conversion. Spread Shot's heavy Speed scaling (+150% at max level) makes the conversion meaningfully larger on this weapon than on Long Gun or Short Gun. Wicked Season (XIII) is a secondary pick for endless-mode runs because Ariana finds special pickups from light sources, which Curse spawns more of.
No. Per the wiki effects block, Spread Shot's spread is at fixed interval angles regardless of Area scaling. Candelabrador adds Area, which doesn't widen the cone. The passive slot is better spent on Wings (for Ariana's Move-Speed-to-Armor conversion), Bracer (for the Long Gun and Short Gun evolution gates), or Spinach (for raw damage scaling).
Per the wiki, Ariana gains 1 Armor per 10% Move Speed, with a maximum of +10 Armor at +100% Move Speed. This means Wings (+30% Move Speed) becomes a defensive pick on Ariana, not just offensive. Combined with her starting +20% Move Speed, she sits near +50% Move Speed (so +5 Armor) within a few level-ups, and the cap is reached around +100% Move Speed via Wings stacking and stage pickups.
Yes, on Ariana specifically. The +8 Amount scaling across 8 levels is the highest projectile-count scaling of any Operation Guns DLC weapon, and Ariana's per-Prototype Cooldown passive turns the dual-passive evolution gate into a build-defining synergy. On non-Ariana characters Spread Shot is mid-tier, since the per-Prototype Cooldown bonus doesn't apply and Long Gun or Short Gun cover similar build niches more efficiently.
For other Operation Guns DLC weapon spokes, see our Short Gun guide and our Metal Claw guide. For Castlevania DLC weapons, see our Raging Fire guide, our Ice Fang guide, our Gale Force guide, our Rock Riot guide, our Alchemy Whip guide, our Shuriken guide, and our Coat of Arms guide. For thrown-projectile and grenade comparisons, see our Javelin guide, our Hand Grenade guide, and our Arma Dio guide. For base game weapon comparisons, see our Pentagram guide, our Glass Fandango guide, and our Gaze of Gaea guide. The weapon tier list ranks every weapon in v1.13 and the weapon evolution chart covers every recipe including Prototype C. The passive items guide walks through Empty Tome, Weapon Power-Up, Bracer, Wings, Spinach, and Duplicator. The main Vampire Survivors guide is the hub for everything else.


Image sprites and screenshots sourced from the Vampire Survivors Wiki (vampire.survivors.wiki) under CC BY-NC-SA 3.0.