
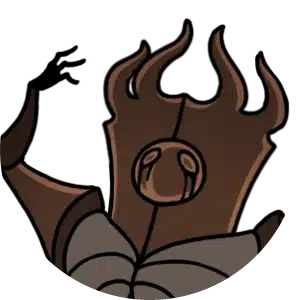
The towering arbiter who guards the Grand Gate and decides who is pure enough to enter the Citadel.
The Last Judge swings a flaming thurible the size of Hornet and hits twice as hard as most early threats, which is why it walls so many players at the end of Act 1.
It blocks the Grand Gate in the northeast of the Blasted Steps. Per the wiki, the fight only triggers after Hornet rings all five Bellshrines and tries to open the gate with the Needolin.
This is a two-phase fight at 720 HP, and the second half adds fire to almost every attack. Clearing it opens the road into the Citadel and counts as a major Act 1 milestone.
This guide covers the location and trigger, every attack across both phases, the reward, and the strategy that drops the Judge fastest.
A two-phase guardian boss with 720 HP and double-damage hits. Northeast Blasted Steps, at the Grand Gate.
 Ring all five Bellshrines in Act 1 first.
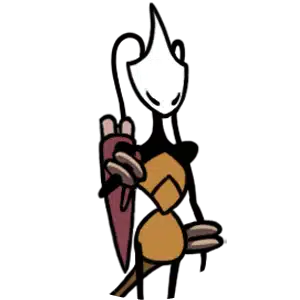 Access to the Citadel and the Judge achievement.
The Last Judge is the final arbiter of the Blasted Steps, a huge Judge sworn to let only the sinless pass into the Citadel. According to the wiki, it emerges from the shadows the moment Hornet tries to open the Grand Gate, killing the two Pilgrims at her side with its opening throw.
Its Needolin lines ("Only the pure may pass" and "Smite the sinners") frame the whole encounter as a purity test. It is one of the first major Act 1 walls in  Silksong's boss roster, and the difficulty spike catches most players off guard.
The thurible it carries is both its weapon and its phase timer. Once that censer catches fire, the Judge stops being a melee bruiser and starts flooding the arena with flame.
You cannot reach the Last Judge until every Bellshrine in Act 1 is rung. The wiki specifies all five Bellshrines must be activated, after which Hornet and the Pilgrims attempt to open the Grand Gate with the Needolin and the Judge appears to stop them.
The arena sits in the northeast of the Blasted Steps. The same bell system gates other content too, so the run-up overlaps with the Bell Beast and the wider bell network across Pharloom.
Because the fight closes out a long stretch of Act 1, treat it as a checkpoint boss. The encounter is required, not optional, so there is no way around it on the path to the Citadel.
Phase 1 runs from 720 down to 541 HP and is a melee-range bruiser phase. All of these attacks deal 2 mask damage, double the sting of a standard enemy hit, so spacing matters more than usual.
| Attack | What it does |
|---|---|
| Slam | Leaps, hovers, then strikes the ground at your position |
| Thurible Throw | Tosses the censer in an upward arc, then pulls it back |
| Thurible Spin | Spins the weapon around its body and deflects projectiles |
| Adjust | Quick low hops forward or backward to reposition |
| Leap | Repositioning jumps, often toward the center of the arena |
The first encounter always opens with a Thurible Throw, which is the attack that wipes out the two Pilgrims. The Slam and Leap have narrow hitboxes, so small sidesteps leave you clean openings to swing back.
Stagger comes at 14 hits. Per the wiki, landing those hits staggers the Judge into a kneel, which is your safest window to pour in damage or heal.
At 540 HP the thurible ignites, the Judge shouts, and every major attack gains a fire component. Fire hits also deal 2 damage, but the wiki notes they drop to 1 with the Magma Bell equipped.
| Attack | What it does |
|---|---|
| Blazing Rings | Concentric fire rings expand outward from the boss |
| Exploding Thurible Throw | The thrown censer detonates after impact |
| Searing Slam | A slam followed by two burning shockwaves crossing the floor |
| Pillar Charge | Charges across the arena, leaving three evenly spaced fire pillars |
| Judgement | One-time attack at 216 HP: extended Blazing Rings that switch patterns, then leave the Judge exhausted |
Fire attacks are telegraphed by clouds of smokey incense that mark the danger zone shortly before they ignite, so watch the smoke rather than the boss. Judgement is the scariest moment, but it ends with a long recovery window worth saving your hardest combo for.
One last trap waits at the end. When the Judge dies it triggers a Retributive Explosion, and the wiki states that if Hornet falls to that blast the whole fight resets.
The cleanest approach is patient punishing: dodge into the narrow gaps, land two or three hits, and reset to neutral. The Judge rewards restraint far more than aggression, since one greedy combo into a fire attack erases a full mask of health.
In actual play, a Swift Step dash cleanly clears the Thurible Throws and repositions you for the Slam punish. The Magma Bell is the single best gear pick here because halving the fire damage turns Phase 2 from lethal to survivable. Pair it with whatever  crest you are most comfortable spacing with.
For Pillar Charge, jump the charge and land between two of the three flames rather than trying to outrun them. For Blazing Rings and Judgement, move through the expanding gaps instead of away from them, since the rings are faster than Hornet at a flat sprint.
Beating the Last Judge opens the Grand Gate and grants access to the Citadel, the central hub the back half of the game revolves around. Per the wiki, the win also unlocks the Judge achievement and pushes Act 1 toward its close.
This is a progression gate more than a loot drop, so the payoff is the road forward rather than a new tool. Reaching the Citadel opens up a wave of new vendors, wishes, and routes across Pharloom.
If you stalled here, clearing the Judge is usually the point where a run finally opens up. Our playtime guide puts this milestone early in a roughly 25-hour main story.
The Last Judge is the gateway into the Citadel. These guides cover the gear, bosses, and story it opens up.

Game data and screenshots adapted from hollowknight.fandom.com, used under CC BY-SA 3.0. Original content remains the property of the wiki contributors and Team Cherry.