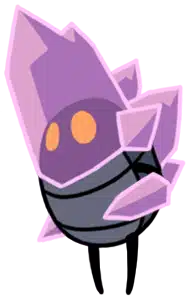
The crystal-encased Husk Miner pretending to sleep on a bench, who fires light beams and returns as the Enraged Guardian.
The Crystal Guardian is the bench that bites back. Per the wiki, "the Guardian is first found on a Bench outside shacks in the middle of the Crystal Peak. He appears dead but prevents the Knight from resting. Striking him wakes him up and starts the fight." Most players hit him by accident trying to save.
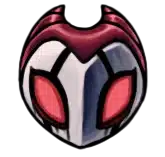
According to the wiki, the lore is a sad Husk-Miner twist. "The Crystal Guardian is part of the miners of Crystal Peak who died from the Infection and were reanimated by it. He appears larger than the other husks and has crystals growing on his back and encasing both his arms and its head. He also has more mastery over the crystal's light than the Crystallised Husks." Just a bigger, lazier Miner who can't mine anymore.
The wiki specifies the two-form structure. "The Enraged Guardian is his second, stronger and faster form. Both forms have to be beaten to unlock his Journal entry." After defeat, he "stands up and escapes by jumping through the ceiling. The Guardian can be followed to the room above his abandoned resting place using the Monarch Wings."
This guide covers the Crystal Peak bench arena, the three-manoeuvre Laser Beam moveset, the Sky Beams and Hop telegraphs, the Enraged Guardian rematch above the original room, the Mask Shard pickup after the second defeat, and the Pantheon of the Artist 2nd-boss role with its spike-wall arena change.
The crystal-encased Husk Miner, sitting on a bench in Crystal Peak. Central Crystal Peak bench room, outside the miner shacks.
 385 Geo, central Bench access, plus a Mask Shard after the second form.
 Enraged Guardian, fought above the original room via Monarch Wings.
The Crystal Guardian is what a Husk Miner becomes when the Infection wins completely. Per the wiki, "the Crystal Guardian is part of the miners of Crystal Peak who died from the Infection and were reanimated by it." The crystals encasing his arms and head are the visual signature; the regular Crystallised Husks have crystals on their bodies too, but at smaller scale.
According to the wiki, the voice tells the lore. "While encased in crystal, the Guardian shrieks similarly to the Radiance although at a higher pitch. When cleared of the crystal, he has a normal bug voice." The crystal mediates the Radiance influence; breaking the encasing exposes the dying bug underneath.
The wiki specifies the tired-miner framing. "Like the other miner husks, he is obsessed with the light but has grown too tired to mine it relentlessly as they do." That is why he sits on the bench rather than working with the other husks; the Infection has burnt him out rather than driving him to mine.
The Hunter's Journal entry asks the lore question directly. "How does the world look to this creature, gazing out from within its crystal prison? Does it see only light? Is that what drives it into a frenzy?" The Hall of Gods answer: "I rest amongst crystals and strange machinery. Shining god of greed." The greed is for light, not Geo.
The Crystal Guardian sits on a bench in the centre of Crystal Peak. Per the wiki, the arena "can be encountered for the first time in the Bench room in the centre of Crystal Peak." The bench itself is the trap: trying to sit triggers the alert; striking the Guardian opens the fight.
According to the wiki, the post-fight beat is a chase. "Upon defeat, the Guardian's crystal growths shatter. Still animated by the Infection, he stands up and escapes by jumping through the ceiling." The Guardian regenerates his crystals one room up, where the Enraged rematch happens.
The wiki notes the Monarch Wings gate for the second form. "The Guardian can be followed to the room above his abandoned resting place using the Monarch Wings. There, he has regained his crystal growths, but his first defeat has made it mad with anger, triggering his second form, the Enraged Guardian." Players without Monarch Wings can clear the first form but not the Mask Shard route.
The Crystal Guardian has three named manoeuvres. Per the wiki, the moveset is all about beams and positional control; he never leaves the centre of the arena except via Hop.
According to the wiki, the combo problem is specifically Sky Beams plus Laser Beam. "A combination of the Sky Beams and Laser Beam attacks limits safe movement the most." Stuck between an overhead column and a horizontal beam, the Knight has limited dash space; pre-position before the Sky Beams telegraph.
Per the wiki, the cheese exists. "Crystal Guardian can be defeated without triggering the boss fight by dealing damage from a distance." Standing in the doorway and casting Vengeful Spirit or Howling Wraiths from outside the trigger radius lets the Knight take him out without the fight cinematic. In actual play this saves 30-60 seconds per attempt.
The dominant Crystal Guardian route uses spells for safe damage. Per the wiki, "Desolate Dive / Descending Dark and Vengeful Spirit / Shade Soul Spells are useful for dealing safe damage. The Howling Wraiths / Abyss Shriek Spell can be used while right next to the Crystal Guardian, although this method is slightly riskier."
 Desolate Dive (spell: invincibility frames during beam attacks)
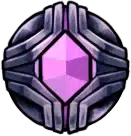 Quick Focus (faster heals between Laser Beam attacks)
According to the wiki, the nail-strike rhythm is "slash at the Guardian with the Nail a few times in between Laser Beam attacks." The Laser Beam recovery is the only consistent open window; trading hits during the beam itself costs Masks.
The wiki specifies a dash-over technique. "Another strategy, which is not mutually exclusive to the previous one, is to, during a Laser Beam Attack, jump and dash over the Crystal Guardian to avoid his attack and safely strike him." Dash through the beam, land behind the Guardian, get hits in before the next attack.
The wiki notes the down-strike rule. "Crystal Guardian's armour protects him from being damaged with a Nail-bounce." Pogo-strike attempts deal zero damage; aim horizontal slashes only, or use Desolate Dive for overhead damage.
The Enraged Guardian is the second-form rematch. Per the wiki, "his first defeat has made it mad with anger, triggering his second form, the Enraged Guardian. Defeating him a second time breaks his crystal armour again and kills him. This also gives access to a Mask Shard, found within a large crystal deposit." The same moveset, faster, with a mandatory Mask Shard payoff.
According to the wiki, both forms are required for the kill counter. "Both forms have to be beaten to unlock his Journal entry." Players who quit after the first fight miss the Hunter's Journal completion as well as the Mask Shard.
The wiki specifies the Pantheon return. "Pantheon of the Artist, 2nd boss. Health: Attuned difficulty 650. Ascended difficulty 900. Arena changes: The arena is much larger than the base game fight, spikes now added to the top half of both walls of the arena. Starts the fight with a random attack." The larger arena helps; the wall-spikes punish wall-jumping; the random opener removes the predictable entry pattern.
The Crystal Guardian gates the central Crystal Peak bench and the Enraged Guardian Mask Shard. These spokes pick up the threads.

Game data and screenshots adapted from hollowknight.fandom.com, used under CC BY-SA 3.0. Original content remains the property of the wiki contributors and Team Cherry.