
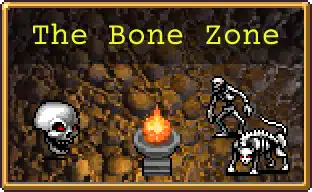
Second challenge stage. Drops the Forbidden Scrolls relic. Highest gold bonus in the game.
The Bone Zone is the gold farm. Per the wiki, stacking Hyper mode and Inverse mode on this stage produces a +300% gold bonus, which is tied for the highest gold multiplier in the game alongside Mt. Moonspell. Most stage farms top out at +90%; the Bone Zone doubles that ceiling and doubles light source spawn frequency on top.
The other reason to run it is the Forbidden Scrolls of Morbane relic. According to the wiki, defeating Sketamari due south of the starting area drops the relic that lets the player cast every Vampire Survivors spell, including rottingpizza (which unlocks this same stage). The bootstrap paradox is documented in the wiki trivia.
Enemies scale uncapped per minute. Per the wiki, +0.3 health and +0.05 speed compound every 60 seconds with no upper bound, additive with Inverse mode. By minute 20 the standard skeleton waves carry double their starting health, and Inverse runs push them into triple. No item drops complete the difficulty triangle: gold and Survarots only, no passive items spawn.
This guide covers the Bone Zone unlock chain, the Sketamari kite-south fight that drops the Forbidden Scrolls, the four ring items that spawn with the Yellow Sign, the Stalker and Drowner map events at minutes 10 and 20, and the gold-farming math for the +300% Hyper plus Inverse ceiling.
The Bone Zone, second challenge stage. Released 24 April 2022 in patch 0.5.1. Unlock Hyper mode on three normal stages (any three of Mad Forest, Inlaid Library, Dairy Plant, Gallo Tower, Cappella Magna).
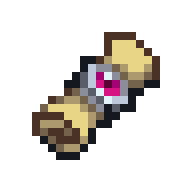 Forbidden Scrolls of Morbane relic from defeating Sketamari due south by kiting horizontally.
 +300% gold bonus with Hyper plus Inverse, the highest gold multiplier in the game per the wiki.
The Bone Zone unlocks once the player has unlocked Hyper mode on three normal stages. Per the wiki, the standard route is Mad Forest, Inlaid Library, and Gallo Tower because all three Hyper unlocks come from clean 25-minute boss kills with no special items required. The alternative is the Forbidden Scrolls spell "rottingpizza," which adds the Bone Zone directly to stage selection.
| Method | What it requires | Notes |
|---|---|---|
| Hyper unlock on 3 normal stages | Defeat Giant Blue Venus (Mad Forest), Stella Castra (Inlaid Library), and any other normal stage Hyper boss at minute 25 | The canonical route. Each Hyper unlock is a clean 25:00 boss kill |
| Cast rottingpizza | One Forbidden Scrolls cast per run | Bootstrap unlock. Same relic the Bone Zone drops per the wiki trivia |
According to the wiki, the rottingpizza route is the documented bootstrap paradox: the relic that lets the player cast the unlock spell is itself unlocked by defeating Sketamari inside the Bone Zone. The wiki specifies this explicitly, noting "despite unlocking the Forbidden Scrolls of Morbane in this stage, you can use the very same relic to unlock the stage."
The Bone Zone runs on uncapped enemy scaling. Per the wiki, every minute of game time adds +0.3 to enemy health multiplier and +0.05 to enemy speed multiplier with no cap. By minute 20 the enemies carry roughly x7 health and x2 speed relative to their base values, and Inverse mode stacks additively on top.
| Stat | Normal | Hyper |
|---|---|---|
| Time limit | 30:00 | 30:00 |
| Starting spawns | 30 | 60 |
| Player move speed | x1.25 | x1.9 |
| Enemy move speed | x1.25 (+0.05/min) | x1.9 (+0.05/min) |
| Projectile speed | x1 | x1.15 |
| Gold multiplier | x1.5 (+50%) | x2 (+100%) |
| Enemy health | x1 (+0.3/min, no cap) | Same scaling |
| Destructible chance | 40% (max 40% with Luck) | Same |
| Theme | Unholy Invocation | Unholy Invocation |
Per the wiki, the Hyper mode for Bone Zone unlocks by default the moment the stage itself is unlocked, which is unique among challenge stages. Most challenge stages require a separate Hyper-mode boss kill. This is the structural reason the +300% gold ceiling is reachable on the first Bone Zone run that flips Inverse mode.
Sketamari is the relic boss. Per the wiki, the encounter triggers due south of the starting area, and the boss is defeated by kiting it back and forth horizontally while damage stacks. The wiki specifies the boss movement was slightly reduced in the 12 August 2022 hotfix to make the horizontal kite more reliable.
| Detail | Value |
|---|---|
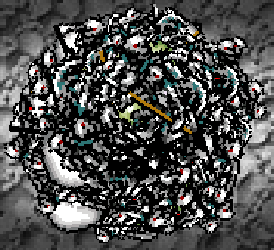 Boss name Boss name | Sketamari (rolling skull ball) |
| Location | Due south of the starting area |
| Pattern | Rolls back and forth. Kite horizontally so damage stacks on each pass |
| Reward | Forbidden Scrolls of Morbane relic |
| Hotfix history | Movement speed reduced 12 August 2022 |
| What the relic does | Adds the spell-cast menu, which lets the player trigger unlock spells (rottingpizza, flymetothemoon, everywhere, coopwhen, forbiddenbox) |
The Forbidden Scrolls relic is one of the highest-value unlocks in the base game. According to the wiki, it gates every Secrets-menu spell that bypasses standard unlock requirements. A single Bone Zone run for this relic compresses the entire DLC-stage unlock chain into one cast per stage afterward.
Build into Garlic before the kite fight. Per the wiki, Sketamari takes damage from contact-radius weapons that stay on top of the kite line. In actual play, the horizontal back-and-forth pattern favors short-range AoE over projectile-heavy builds because the boss often slips past projectile spawn cycles between passes.
The Bone Zone is the canonical gold-farming stage. According to the wiki, enabling Hyper mode and Inverse mode together produces a +300% gold bonus, the highest gold modifier in the base game. Mt. Moonspell from the Legacy of the Moonspell DLC matches this ceiling but no other base stage comes close.
| Mode stack | Gold bonus | Why use it |
|---|---|---|
| Normal only | +50% | First-time clears, relic farm |
| Hyper only | +100% | Mid-tier farm, no Inverse unlock needed |
| Inverse only | +50% (base) + Inverse multiplier | Hyper-mode unlock blocked |
| Hyper + Inverse | +300% | Maximum farm. Tied with Mt. Moonspell for the game record |
Per the wiki, light sources in the Bone Zone attempt to spawn twice as often as other stages, and they only drop gold coins, small coin bags, and Survarots (no passive items). The doubled spawn rate plus the +300% multiplier means a clean Bone Zone Hyper-plus-Inverse run can bank four to five times the gold of a standard Mad Forest run in the same time. Stack Stone Mask, Crown, and the Greed (XVII) arcana for the highest yield in real runs.
The Bone Zone is one of two base stages that spawn all four ring items when the player carries the Yellow Sign. Per the wiki, the four pickups are positioned one in each compass direction from spawn, which makes the Bone Zone the cleanest single-stage Infinite Corridor evolution route in the base game.
| Item | Location |
|---|---|
 Silver Ring Silver Ring | North of starting area |
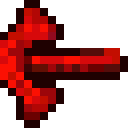 Metaglio Right Metaglio Right | East of starting area |
| Gold Ring | South of starting area |
 Metaglio Left Metaglio Left | West of starting area |
According to the wiki, the four ring pickups only appear if the player has obtained the Yellow Sign and walks into the Bone Zone with it equipped. Without the Yellow Sign, no passive items spawn at all and the stage stays a gold-and-Sketamari run. With the Yellow Sign, the Bone Zone becomes the Infinite Corridor evolution stage that pairs with the 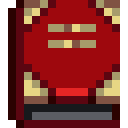 Empty Tome and Clock Lancet evolution chain.
Two former-stage Reapers appear as map events mid-stage. Per the wiki, The Stalker spawns at 10:00 for 60 seconds and The Drowner spawns at 20:00 for 60 seconds. Neither replaces the standard end-of-timer Reaper, which still arrives at 30:00 as in every base stage.
| Time | Map event | Notes |
|---|---|---|
| 10:00 | 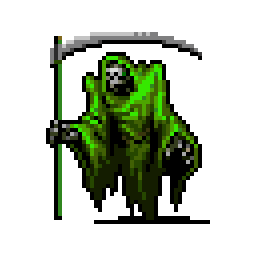 The Stalker (60 seconds) The Stalker (60 seconds) | Gallo Tower's Reaper. Follows the player but can be killed for XP and gold |
| 20:00 | 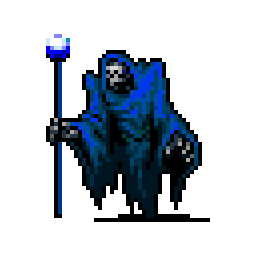 The Drowner (60 seconds) The Drowner (60 seconds) | Dairy Plant's Reaper. Same kill-for-rewards rules |
| 30:00+ | The Reaper | Standard end-of-timer Reaper. Spawns one extra per minute past 30 |
The wiki notes the Bone Zone is one of only two base game stages that feature both The Stalker and The Drowner inside the same run, with Cappella Magna being the other (which also adds The Trickster). After a few runs, the 10:00 and 20:00 marks become natural reset points for kite patterns, since both events take a chunk of mid-stage screen real estate while active.
Pair the Bone Zone gold farm with the ring chain that the four Yellow-Sign pickups assemble and the passives that survive the per-minute enemy scaling.

Game data and screenshots adapted from vampire.survivors.wiki, used under CC BY-NC-SA 3.0. Original content remains the property of the wiki contributors and Poncle.