The Infection-twisted scholar at the top of Soul Sanctum who drops Desolate Dive and the Soul Tyrant rematch.
Soul Master is the fight that introduces players to Hollow Knight's fake-out endings. Per the wiki, after the first health bar empties he "undergoes a long, drawn-out death sequence ending with him leaving behind his signature Desolate Dive spell." Most players go to absorb the spell and get smashed through the floor for Phase 2.
According to the wiki, his lore is a cautionary tale about the Infection wearing a scholar's face. "Soul Master hoarded Soul and consumed it, eventually gaining new Soul powers... However, he was driven to obsession in his quest for immortality, and lost his sanity while trying to get closer to the light that was guiding him in his mind." That light is The Radiance.
The wiki specifies the moveset. Phase 1 is six attacks (Dash, Orb, Clock, Slam, Fake Out Slam, Teleport) with teleport between each. Phase 2 strips it down to three attacks but raises the difficulty: Altered Slams chain 4 to 7 times, the homing Altered Orb conjures from random spots for nearly 10 seconds, and shockwaves explode rather than travel.
This guide covers the Soul Sanctum location, the Pale King refusal lore, the two-phase moveset with the fake-death transition, the Desolate Dive drop, the Soul Tyrant Dream Nail rematch behind the corpse, and the Spell-build approach that trivialises both fights.
Leader of Soul Sanctum, the Infection-driven scholar who hoarded SOUL to chase immortality.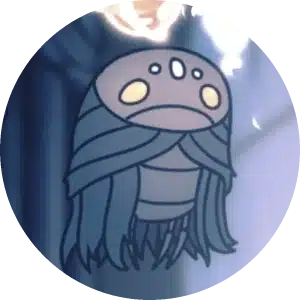 Soul Sanctum, top of the City of Tears, reached via the King's Pass-equivalent path through the Sanctum corridors.
 Desolate Dive, the downward spell that breaks the floor and opens hidden routes.
 Soul Tyrant, fought via Dream Nail on the corpse for Awoken Dream Nail progress.
Soul Master is the scholar who broke Hallownest's rules to fight the Infection alone. Per the wiki, he "is the leader of the Soul Sanctum of Hallownest, which searched for ways to expand the minds of bugs and attain pure focus. When the Infection started, he came to the conclusion that Soul, the energy animating bugs and beasts alike, was the solution to cure their mind of this plague."
According to the wiki, his project went against the throne. "He refused to listen to the Pale King opposing his work, and failed to realise that his own Infected mind was influencing him." The Pale King knew the research path led somewhere bad; Soul Master assumed he knew better. He was already Infected when he made that judgement.
The wiki specifies the consequence. Soul Master "hoarded Soul and consumed it, eventually gaining new Soul powers. He had Soul Totems gathered in the Sanctum and drained many unfortunate bugs of their vital energy. Unlike the rest of the Kingdom's inhabitants, he and his followers were able to survive the Infection. However, he was driven to obsession in his quest for immortality, and lost his sanity while trying to get closer to the light that was guiding him in his mind." The light is The Radiance; his immortality bid was Radiance's recruitment.
Soul Master's arena sits at the top of Soul Sanctum, in the upper-left of the City of Tears. Per the wiki, "the Knight encounters Soul Master at the top of the Soul Sanctum where he ambushes them. After being seemingly beaten, Soul Master releases his Desolate Dive spell. If the Knight attempts to absorb it, Soul Master reappears to take it back and smashes through the glass rooftop for another round."
According to the wiki, the post-fight rewards are twofold. "When killed, at last, he releases the spell again while also granting access to other rooms of the Sanctum, including a bounty of Geo, two Soul Totems, a Hallownest Seal, and the Shaman Stone Charm." Shaman Stone is the spell-damage Charm; pairing it with Desolate Dive immediately makes every nearby spell-fight faster.
The wiki specifies the Sanctum's decay. The researchers Soul Master led are still there as enemies: Soul Twisters teleport-cast Vengeful Spirit, Soul Warriors swing nail copies, and Soul Sucker husks drain SOUL on contact. The whole building is a museum of what unsupervised Soul research becomes when the head researcher is Infected.
Soul Master has two phases with a fake-death transition between them. Per the wiki, Phase 1 runs six attacks with a teleport between each; Phase 2 strips to three but ramps the difficulty.
According to the wiki, Phase 2 begins with the famous floor-smash. "After receiving enough damage, Soul Master undergoes a long, drawn-out death sequence ending with him leaving behind his signature Desolate Dive spell. However, just before the Knight can absorb the spell, he reappears, slamming through the ground, and the battle enters its second Phase." The drop is the Phase 2 arena.
The wiki specifies the three Phase 2 attacks. "Altered Slams" home in slightly with explosion radius instead of shockwaves, chaining 4 to 7 in a row. "Fake Out Altered Slams" repeat the abort trick. "Altered Orb" hovers in place for 8.5 to 10.5 seconds, conjuring 3 to 4 orbs from random arena positions every second; the orbs still home on the Knight.
Per the wiki, "this Phase is overall significantly easier than the first Phase due to the predictable nature of the Soul Master's attacks, the lack of shockwaves on his Slams, and his openness to attacks during his projectile attack." In actual play, Phase 2 is shorter but offers fewer heal beats; bank Masks during the floor-fall transition and commit to damage.
Soul Master melts to a Spell build because his stagger threshold is 9 hits. Per the wiki, "If in the Hall Of Gods, or you have obtained Abyss Shriek before the fight, Abyss Shriek paired with Shaman Stone deals extreme damage to Soul Master and staggers him easily." On a fresh run players use Vengeful Spirit; the Charm choice is the same.
 Quick Focus (faster heals during the Clock attack window)
 Grubsong (SOUL on taken damage to keep Spells available)
According to the wiki, the Clock heal window is the lifesaver. "He leaves many open opportunities to heal, especially when he deflates after taking enough damage. Staying in the centre after he finishes his Clock attack is also a good opportunity to heal multiple times." Mid-arena positioning works in both phases and across the Soul Tyrant rematch.
The wiki specifies the wall tech. "A good strategy when fighting The Soul Master is to stay near walls. When he conjures an orb you can mantis claw off the wall and dash toward him for a few hits. This is risky because if he teleports right next to you and conjures an orb, it's likely to hit you." In real runs the centre is safer than the wall; the wall tech is a DPS option for confident players.
The Spell-burst route shortcuts the entire fight. Per the wiki, "it is also very easy to defeat this boss by using Abyss Shriek combined with Shaman Stone as he uses the clock attack. Just jump between Soul Master and the orbs and cast Abyss Shriek 3 times, which should cause him to enter his second phase." On post-Abyss returns this turns Soul Master into a Charm-test rather than a skill check.
Soul Tyrant is the Dream Nail rematch on Soul Master's corpse. Per the wiki, "Soul Tyrant is the Dream Boss variant of Soul Master. He is accessible upon returning to Soul Master's Corpse and striking it with the Dream Nail." The corpse lies at the bottom of the Phase 2 arena; a Dream Nail strike pulls the Knight into the dream-version of the fight.
According to the wiki, Phase 1 keeps the same six attacks but speeds them up. "Soul Tyrant uses all the same attacks as Soul Master, but at a much faster pace, with minor adjustments to some attacks: Clock now summons six (two rows of three) orbs that rotate around him. Slam shockwaves are taller, larger, and travel at a faster pace." The Clock attack becomes a no-jump pattern; you need Mantis Claw walls or Shape of Unn slide.
The wiki specifies Phase 2's single change. "Altered Slam: The impact radius of each Slam attack is much larger." Combined with the back-to-back pacing, Phase 2 leaves "virtually no more time to heal, as his orbs come at a non-stop pace, one after the other." Heal during the Phase 1 transition; commit to damage afterwards.
The wiki recommends the Spell route. "During this phase, Soul Tyrant's health is also considerably low, so using high damage Spells like Abyss Shriek or Desolate Dive on him while he summons orbs is a good way to kill him quickly before too much damage is taken. Soul Tyrant, unlike his weaker counterpart, does not perform a Fake Out Altered Attack." Phase 2 is short, predictable, and burns to spells.
Soul Master ties into Soul Sanctum, the Desolate Dive spell line, and the Dream Nail rematch chain. These spokes pick up the threads.
Game data and screenshots adapted from hollowknight.fandom.com, used under CC BY-SA 3.0. Original content remains the property of the wiki contributors and Team Cherry.