The Infected, lone Mawlek calling for breeders that never come, the optional Forgotten Crossroads boss who drops a Mask Shard.
The Brooding Mawlek is the lonely boss of the early game. Per the wiki, "one lone Brooding Mawlek can be found off-road in the Forgotten Crossroads, far from its living brethren in the Ancient Basin. It sits amidst fossilised remains of its kind and calls for them to breed." The fight is a roar into a graveyard.
According to the wiki, "this wild beast was driven mad both by its loneliness and the Infection which started covering its body with bulbs." The Infection bulbs are visible in its sprite; the lonely calls are heard from rooms away. The Hunter's Journal entry: "I hear this beast crying out sometimes as I prowl the caverns, although I've never actually laid eyes on it. Who or what is it calling for? As far as I can tell, its voice is never answered."
The wiki specifies the moveset: Spit, Slash, Leap, and Vomit. Slash retaliates if hit without reach Charms; Leap covers most of the arena; Vomit fills the air with arcing acid blobs. The Mask Shard drop makes it worth tackling early; the Pantheon of the Master rematch makes it worth mastering late.
This guide covers the hidden room access via wall-jump or Mantis Claw, the four-attack moveset with the retaliation rule on Slash, the Baldur Shell heal pocket, the Trial of the Fool rematch in the Colosseum, the Pantheon of the Master boss slot, and the Tiso cameo in the Pantheon of Hallownest entry.
The lone Infected Mawlek, calling for breeders in the Forgotten Crossroads fossil-room. Hidden room in Forgotten Crossroads, past a wall-jump or Mantis Claw section.
 Mask Shard, one of the easier-to-reach early-game shards toward the next Mask.
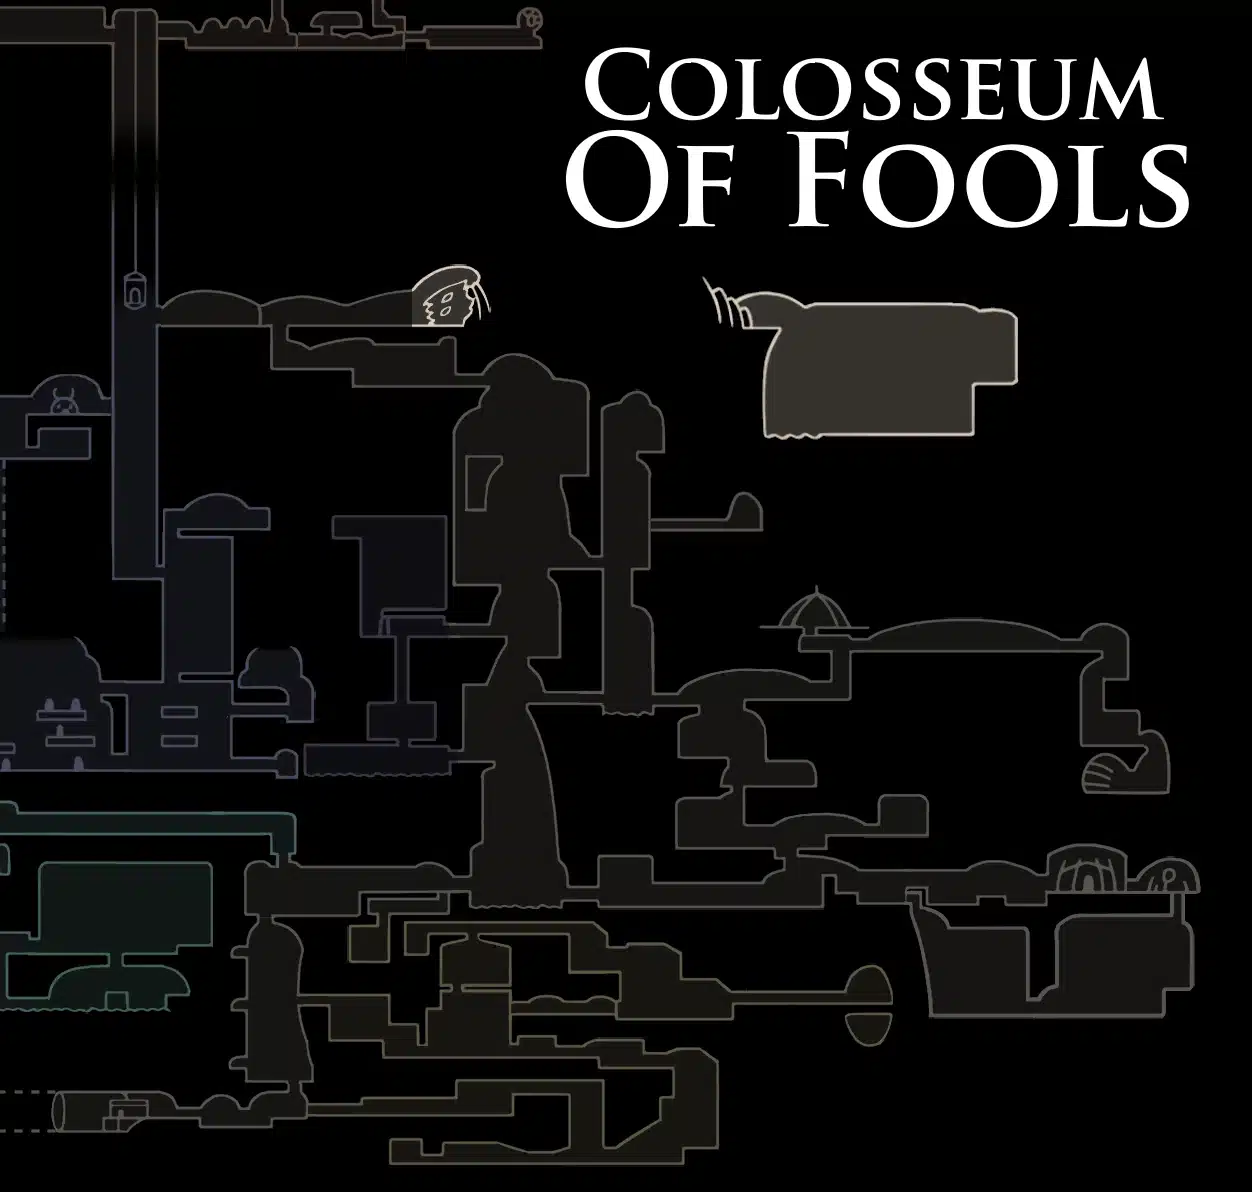 Trial of the Fool, where a second Mawlek is fought in a tighter Colosseum arena.
The Brooding Mawlek is the last of its kind in the upper kingdom. Per the wiki, "Mawleks such as them are suspected to be distant relatives of the Goam, perhaps sharing an ancient ancestor." The Mawlek species' main population lives in the Ancient Basin; the Forgotten Crossroads one was cut off by geography and time.
According to the wiki, the fossil graveyard around its arena is its dead family. "It sits amidst fossilised remains of its kind and calls for them to breed." The Mawlek corpses west of the boss room are the visual confirmation; the calls audible from neighbouring rooms are the audio confirmation. The fight is grief in motion.
The wiki specifies the Infection state. "This wild beast was driven mad both by its loneliness and the Infection which started covering its body with bulbs." Same lore beat as Soul Master and False Knight: a sad creature first, then a hostile one. The Mawlek's call survives as the Hall of Gods tag: "I call out to no one, hidden by roads and highways. Lonely god of the nest."
The Brooding Mawlek hides behind a wall-jump section in the Forgotten Crossroads. Per the wiki, "the Brooding Mawlek in the Forgotten Crossroads is found beyond a wall jump section in a blocked room to the left of the vertical shaft filled with Gruzzers and Tiktiks." Most players miss it on first pass.
According to the wiki, the entry can be done two ways. "It is possible to reach by Nail-bouncing on the spikes, although it is recommended to have obtained the Mantis Claw instead." Mantis Claw turns the access into a standard wall-jump; the nail-bounce route is a speedrun option that takes patience.
The wiki specifies the entry trigger. "It attacks the Knight as soon as they enter its room by jumping from the background." There is no cinematic; the Mawlek lands behind the Knight as they cross the threshold. Always pause briefly after entering the room to read the landing.
The Brooding Mawlek has four named attacks. Per the wiki, the moveset covers ground, air, and projectile angles, with reach as the deciding factor for safety.
According to the wiki, reach is the deciding Charm choice. "Mark of Pride and Longnail make it easier to damage Brooding Mawlek when it performs the Slash attack while avoiding damage." The extra reach hits the Mawlek from outside its retaliation range.
Per the wiki, the Cyclone Slash chip route is the safest no-Charm option. "If the Knight has managed to obtain the Baldur Shell Charm and the Cyclone Slash Nail Art, it is possible to chip away at the Brooding Mawlek's health with the edge of Cyclone Slash and use the SOUL gained from the attack to heal safely inside Baldur Shell. While using Baldur Shell, the Knight can also enter into the body of the Brooding Mawlek without taking damage, allowing them to heal while it attacks." In actual play, this turns the fight into a slow, safe grind.
The standard Brooding Mawlek loadout pairs reach Charms with high nail uptime. Per the wiki, Mark of Pride and Longnail enable hit-and-retreat without triggering the retaliation rule. Sharp Shadow is the alternative aggression route: "If the Knight has the Sharp Shadow Charm, it can be used to dash through the Brooding Mawlek and deal damage."
 Mark of Pride (reach to hit outside the retaliation range)
 Longnail (stacks with Mark of Pride for maximum nail reach)
 Quick Focus (faster heals between Leap and Vomit windows)
According to the wiki, hit-and-retreat is the pattern. "A solid strategy is to hit it a few times and move away quickly when it raises its claw. It is also possible to jump over and Nail-bounce on it to get to the other side." The Mawlek's claw-raise is the Slash telegraph; retreating during the windup cancels the retaliation cost.
The wiki notes the Leap as a damage window. The Mawlek "cannot Spit or Slash while in the air." Running under a leaping Mawlek and hitting as it lands lands free nail strikes; the only risk is the landing contact damage if positioned poorly.
The Vomit attack offers multiple counters. Per the wiki, "the Knight can also enter into the body of the Brooding Mawlek without taking damage, allowing them to heal while it attacks" with Baldur Shell equipped. In actual play, the centre-of-Mawlek pocket plus Quick Focus turns Vomit into the heal window.
The Brooding Mawlek returns in three places. Per the wiki, "another one can be fought alone during one of the waves of the Trial of the Fool at the Colosseum. This Mawlek presents the same Infected state." The Colosseum arena is much tighter than the Forgotten Crossroads original, making dodging harder.
According to the wiki, the third appearance is the Pantheon of the Master. "Pantheon of the Master, 9th boss. Health: Ascended difficulty 1050 (Pantheon of Hallownest: 750). The arena is the same size as in the Forgotten Crossroads. The middle platform disappears on Ascended difficulty or above." Ascended removes the centre platform; the Knight has to ground-dodge the Vomit.
The wiki specifies the Pantheon of Hallownest cameo. "At the beginning of its fight in the Pantheon of Hallownest, Tiso appears instead as if entering a Trial. This only happens if he has been listened to in the Colosseum. He is then crushed by the Brooding Mawlek falling, which then engages the fight against the Knight." A scripted Tiso death; the Colosseum-listening requirement is the missable trigger.
The Brooding Mawlek anchors the Mask Shard collection path and recurs in the Colosseum Trial of the Fool. These spokes pick up the threads.


Game data and screenshots adapted from hollowknight.fandom.com, used under CC BY-SA 3.0. Original content remains the property of the wiki contributors and Team Cherry.