
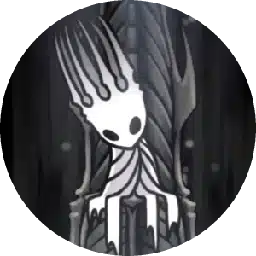
Hallownest's chief researcher, Quirrel's teacher, and the only Dreamer who openly tells the Knight she wants the Seal broken.
Monomon is the Dreamer who wants to be killed. According to the wiki, her Dream Nail dialogue inside her own dream is the only place in the game where a Dreamer admits the Seal must break and that an end to Hallownest's frozen state is "better." The other two Dreamers stay silent on the decision.
Per the wiki, she was Hallownest's chief researcher and teacher before the Pale King put her into eternal sleep. Her Archives in Fog Canyon are still full of her work, including a tank of Charged Lumaflies and stacks of jumbled Lore Tablets that spell out the words KINGLIGHT, OLDLIGHT, VESSEL, VOID, SEAL, EGG, and DREAMER if read together.
The wiki specifies that her apprentice Quirrel is the character who actually escorts the Knight to her sleeping body. Quirrel intervenes during the Uumuu boss fight that gates Monomon's acid tank, helping the Knight break the jellyfish's invulnerability. After the fight, he reaches her tank first.
This guide covers Monomon's identity as the Teacher of Hallownest, the Teacher's Archives location in Fog Canyon, the Uumuu boss fight and Quirrel's role in it, the Dream Nail dialogue that reveals her regret, the canonical Lore Tablet content in the Archives, and the Seal-breaking mechanics that close her story.
Monomon the Teacher, one of the three Dreamers sealing the Black Egg.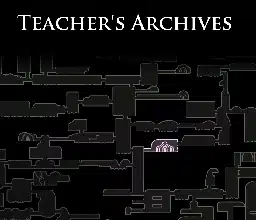 Teacher's Archives in Fog Canyon, inside a sealed acid tank at the top of the zone.
 Uumuu. The jellyfish boss is the wall between the Knight and her tank. Quirrel intervenes mid-fight.
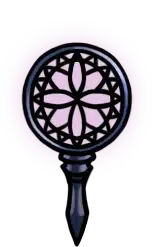 Awoken Dream Nail to enter her sleeping mind and break the Seal.
Monomon was Hallownest's chief researcher. Per the wiki, she ran the Teacher's Archives in Fog Canyon as a working lab and academy, training apprentices and studying the kingdom's natural phenomena. The wiki specifies that her sphere included Charged Lumaflies (the jellyfish creatures unique to Fog Canyon), the kingdom's lore record, and the metaphysics of the Seal mechanism itself.
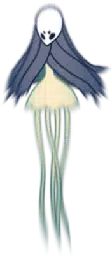
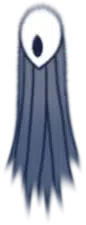
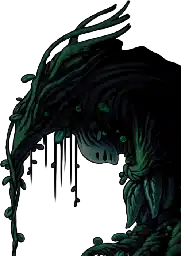
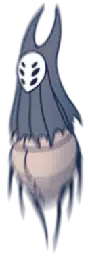
According to the wiki, her physical form is jellyfish-like, consistent with her own research subjects. She is suspended in an acid-filled tank at the top of the Archives. The wiki notes the visual parallel between her and the creatures she studied; one interpretation is that she may have sourced the Fog Canyon Uomas and Charged Lumaflies herself, intentionally or not.
The wiki specifies that her relationship with the Pale King was as a sealed deal, not an order. She agreed to become a Dreamer with the understanding that her body would be put to use as a lock on the Hollow Knight. The wiki frames the agreement as transactional rather than reluctant, which makes her later Dream Nail regret more pointed.
The Archives sit at the top of Fog Canyon. Per the wiki, reaching them requires Isma's Tear for acid immunity, plus navigation through the upper Uoma chambers. The Archives themselves are an inverted lab: glass tanks of preserved specimens, scattered Lore Tablets, and Charged Lumafly displays.
According to the wiki, Quirrel waits for the Knight in the Archives. The wiki specifies that he comments on a feeling of familiarity inside the lab without remembering why, which is the first clue that he is Monomon's lost apprentice rather than a coincidental traveler.
The wiki notes that the Archives are one of the few zones in Hollow Knight with no enemy spawns at the highest level. The room geometry serves more as exposition than combat: the Knight reads tablets, learns about KINGLIGHT and OLDLIGHT, and approaches Monomon's tank uninterrupted. The fight itself is gated outside the Archives proper, at Uumuu's arena one room below.
Uumuu defends the path to Monomon. Per the wiki, the boss emerges from an acid pool in the room preceding Monomon's inner chamber. Uumuu is invulnerable to direct attacks for most of the fight; the Knight cannot deal damage until Quirrel intervenes.
According to the wiki, Quirrel arrives roughly a third of the way into the fight and strikes Uumuu, breaking the jellyfish's shield. From that point on the Knight can hit Uumuu normally, and Quirrel continues to land assist strikes between the Knight's combos. The wiki specifies that this is the only co-op boss fight in the game.
The wiki notes that Quirrel's intervention is the reason most players find Uumuu easier than the other Dreamer gates. Watcher Knights are a six-knight gauntlet; Hornet is a sustained duel; Uumuu has a damage window that opens automatically once Quirrel does the work. In real runs, the fight is over in under two minutes once the Knight learns the acid-jet timing.
Equip Quick Slash and Mark of Pride before triggering Uumuu. Per the wiki, the boss has a short stagger window after Quirrel's strikes; faster Nail combos land more damage during it. In actual play, this shortens the fight to about three Quirrel interventions instead of five and avoids the longer acid-jet patterns at low HP.
Defeating Uumuu unlocks Monomon's acid tank. Per the wiki, the Knight enters the chamber after the fight and finds Monomon suspended inside the tank, surrounded by Quirrel. The wiki specifies that the Knight strikes her body with the Awoken Dream Nail to enter her sleeping mind.
According to the wiki, the dream itself is a brief combat encounter where Monomon's mental form can be attacked directly with the Nail. After the kill, the Knight wakes up in the empty Archives chamber. The wiki specifies that Monomon's physical body disappears at the same moment; the Seal on the Black Egg breaks, and the Archives become a mausoleum.
The wiki notes that Quirrel sits at her tank after the Seal is broken. His later appearance at the Blue Lake connects directly to this scene: having delivered Monomon to the end she chose, he leaves to find peace at the lake shore. In real runs, this is the wiki-confirmed reason Quirrel disappears from his other locations after the Monomon kill.
Monomon's Dream Nail dialogue is the most famous Dreamer line in the game. Per the wiki, striking her sleeping mind with the Dream Nail returns six lines that lay out her position on the Pale King's plan:
According to the wiki, these lines explicitly endorse breaking the Seals. The wiki specifies that Monomon is the only Dreamer with a confessional Dream Nail reveal. Lurien and Herrah do not articulate the same position; their sleeping minds return more abstract impressions.
The wiki notes that the "Better, an end" line is the most cited moment in the entire Dreamer arc. The line is read by the community as the strongest in-game argument for the Embrace the Void ending of Hollow Knight. After multiple runs, the line is what makes killing Monomon feel like completing her wish rather than ending her life.
The Archives are full of fragmented lore. Per the wiki, scattered Lore Tablets in Monomon's lab contain partial phrases that spell out the core mythology of Hallownest when read together. The most-cited tablet vocabulary words are:
| Tablet word | What it refers to |
|---|---|
| KINGLIGHT | The Pale King |
| OLDLIGHT | The Radiance |
| VESSEL | The Hollow Knight (and the Vessels in the Abyss) |
| VOID | The substance inside the Vessels |
| SEAL | The Dreamer Seal on the Black Egg |
| EGG | The Temple of the Black Egg |
| DREAMER | Monomon, Lurien, and Herrah |
According to the wiki, the Archives also contain a tank of Charged Lumaflies. The wiki specifies that these are the same creatures she may have researched into the Fog Canyon Uomas. The Dream Nail dialogue for Uomas returns the line "...Monomon..." and Oomas return "...MONOMON..." in all caps, which the wiki notes as confirmation of the lineage.
The wiki notes that Monomon's lab and the Resting Grounds Lore Tablet "In her Archive, surrounded by fog and mist" are the canonical pair of breadcrumbs to her location. Players who read both before reaching the Archives have a complete mental map of who she is by the time they arrive.
Monomon ties into the Dreamer arc, the Quirrel apprentice chain, and the Fog Canyon ecosystem. These spokes pick up the connected threads.
Game data and screenshots adapted from hollowknight.fandom.com, used under CC BY-SA 3.0. Original content remains the property of the wiki contributors and Team Cherry.