
The Hooks of Heresy are a Lunar item in Risk of Rain 2, part of the four-item Heresy Set added in the Anniversary Update. Picking them up replaces your Survivor's secondary skill (M2 by default) with Slicing Maelstrom: a charged projectile that deals 875% damage per second to enemies caught in its area, then explodes after 3 seconds for an additional 700% damage and roots enemies for 3 seconds.
This guide covers the exact stats and damage formula, the Blockade Breaker unlock challenge, every Survivor that genuinely benefits from the swap (and which ones it ruins), the 4-piece Heretic transformation chain, and a counter-intuitive trick most players miss: charging the skill does not make it hit harder.
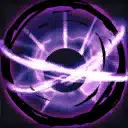
Hooks of Heresy is one of four Lunar items in the Heresy Set. Each item permanently swaps one Survivor skill slot for a Heretic skill while you hold the item. Hooks specifically targets your secondary skill (M2 by default). The replacement skill is Slicing Maelstrom, and it behaves nothing like a typical secondary.
When you press the bound key, your character throws a slow-moving lunar projectile in the direction you are aiming. The projectile travels through enemies and, while in flight, deals 875% damage per second via continuous tick damage to all enemies inside its hitbox. After 3 seconds, it detonates for an extra 700% damage in an area and applies Lunar Root, a 3-second movement-stopping debuff. Stacking Hooks of Heresy increases the root duration by +3 seconds per stack but worsens the cooldown.
Total damage potential per cast is roughly 3,325% if every tick connects (875% × 3 seconds plus 700% explosion), making it one of the highest single-cast outputs in the entire item pool. The catch is the slow projectile travel and the 3-second arming window, which makes timing and positioning critical.
| Stat | Base Value | Per Stack |
|---|---|---|
| DPS During Flight | 875% | No change |
| Explosion Damage | 700% | No change |
| Flight Duration | 3 seconds | No change |
| Lunar Root Duration | 3 seconds | +3 seconds |
| Skill Cooldown | 5 seconds | +5 seconds (worse) |
| Charge Effect | Faster projectile speed | No damage scaling |
| Total Damage Potential | ~3,325% per cast | No change |
Two stat patterns shape every build decision around this item:
Stacking is anti-synergistic for damage. A second Hooks does not increase damage. It only extends Lunar Root from 3 to 6 seconds, and the cooldown worsens by +5 seconds per stack (10s at 2 stacks, 15s at 3 stacks). Two or more copies are typically a damage loss.
Charge does not equal damage. Holding M2 to charge Slicing Maelstrom only increases launch velocity. It does not increase damage. For close-range engagements, fire the skill without charging so the slow projectile lingers on enemies for the full 3-second tick window.
Slicing Maelstrom is one of the few skills in Risk of Rain 2 where charging is actively wrong for most engagements. According to the wiki and confirmed in our own testing, every other charge-up skill (Engineer's Bouncing Grenades, MUL-T's Auto-Nailgun reload, Acrid's Caustic Leap) follows the convention that holding the button longer means more damage. Hooks of Heresy breaks the pattern, and most third-party guides we read still miss this.
Charging the skill from 0% to 100% increases only the launch velocity of the projectile. The damage stays at 875% per second during flight and 700% on explosion, regardless of charge level. Charging takes time, during which you are stationary and unable to dodge.
Here is when each cast type wins in our experience:
Players who treat Slicing Maelstrom like a normal charge skill underrate it. Players who learn the zero-charge close-range trick rate it as one of the best damage skills in the game.
Hooks of Heresy does not drop until you complete the Blockade Breaker challenge. Without that unlock, the item is not in your loot pool and will never appear from any source. The challenge requirement is straightforward but not always quick to satisfy:
Once Blockade Breaker unlocks, all four Heresy items unlock together as a set. You do not need to repeat the challenge for the other three. This makes Blockade Breaker one of the highest-value single-completion challenges in the game.

Hooks of Heresy is a Lunar item, purchased with Lunar Coins from one of three sources:
Important: the Heresy items only enter the loot pool after you complete Blockade Breaker. If a friend has unlocked it but you have not, the items will still not drop in your runs. Each player needs the unlock on their own profile.
Hooks of Heresy specifically replaces secondary skills, which means its value depends entirely on whether your Survivor's existing M2 is essential. Some Survivors barely use M2 and turn into damage monsters with the swap. Others lose their kit identity. Per the wiki and our own testing:


Captain is the standout. His default Power Tazer deals 100% damage with minor stun but scales poorly into late game. Slicing Maelstrom outscales it by an order of magnitude and adds hard crowd control via Lunar Root. Captain players regularly cite this as one of the best secondary swaps in the game.
Acrid benefits because his default secondary is melee-range, and Slicing Maelstrom adds a ranged option to a kit that otherwise demands close engagement. Tick stacking with Acrid's poison debuffs creates significant burst.
Engineer with turrets is a special case. His turrets inherit his items, so each turret gains Slicing Maelstrom on its M2, giving you three concurrent casts. Pre-Patch v1.2.3 there was a bug allowing instant cooldown resets via the Thermal Harpoons painting menu, but it has been patched.
Mercenary loses his Whirlwind dodge-roll, a real mobility loss. Slicing Maelstrom adds ranged damage but most Mercenary mains rate the dodge frames higher than the swap. Commando trades Phase Round (his armor-pierce) for raw burst. Good against Stone Titans and Mithrix, but you lose his only consistent armor-pierce.
Loader is the clearest skip. Her Charged Gauntlet (M2) is the engine of her mobility and damage loop. Replacing it guts her movement, scaling, and grapple chains. Railgunner loses Concussion Device, her crit-window setup. Her primary becomes substantially weaker. False Son (Seekers of the Storm DLC) loses his Lunar Spike consumption mechanic and the bonus speed/regen tied to spent spikes.

Hooks of Heresy is one piece of a four-item Lunar set. Each item replaces one skill slot, and holding all four simultaneously transforms your Survivor into Kur-skan, the Heretic: a secret playable character with the highest base HP in the game (440 plus 132 per level) and the only Survivor who cannot be selected from the start menu.


Per the wiki's lore, Kur-skan was eviscerated and her body parts scattered. Each item represents a body part: Visions are her eyes, Hooks are her arms, Strides are her legs, Essence is her core. Holding all four rebuilds her.
| Slot | Heretic Skill | Effect |
|---|---|---|
| Primary (M1) | Hungering Gaze | Tracking shards, 120% base damage, 12 charges with 2-second reload |
| Secondary (M2) | Slicing Maelstrom | 875% DPS projectile, 700% explosion, 3-second Lunar Root |
| Utility (Shift) | Shadowfade | 3-second intangibility, 30% move speed, 18.2% max HP heal |
| Special (R) | Ruin | Hits apply Ruin stacks; activate to detonate for 300% plus 120% per stack |
Heretic also has negative passive HP regen, meaning her health drains constantly. This is balanced by Shadowfade's 18.2% max HP heal on use and the high 440 base HP pool. Players running Heretic typically pair her with Cautious Slug, Fungus, and N'kuhana's Opinion to compensate.
The fastest path is enabling the Artifact of Command at the start of a run, then visiting the Bazaar Between Time and buying all four Heresy items from Lunar Buds. Total cost: 8 Lunar Coins (2 per Bud).
Once Hooks of Heresy is on your kit, the next decision is which items to stack. Slicing Maelstrom's behavior makes some items significantly better than others.
The 5-second base cooldown is the bottleneck on Slicing Maelstrom uptime. Cooldown reduction is by far the highest-value optimization:
Because Slicing Maelstrom deals damage every tick during its 3-second flight, items that proc on hit compound dramatically:
Soldier's Syringe and other attack speed items have no effect on Slicing Maelstrom. The skill has fixed flight duration and fixed cooldown. Attack speed items are still valuable for your primary, but they do not factor into Hooks itself. Light Flux Pauldron reduces cooldowns by 50% but halves attack speed; the cooldown gain helps Hooks, but the attack speed loss kills your primary.
Hooks of Heresy was added in the Anniversary Update (March 2021) and has received targeted balance tuning since:
| Date | Patch | Change |
|---|---|---|
| 25 Mar 2021 | Anniversary Update | Added to game alongside Essence of Heresy, completing the 4-item Heresy Set |
| PC v1.2.3 | v1.2.3 | Fixed Engineer turret bug that allowed instant cooldown resets via the Thermal Harpoons painting menu |
| Subsequent Updates | Various | Damage values stayed consistent at 875% DPS / 700% explosion / 3-second root since release |
The Engineer bug history matters if you watch older Risk of Rain 2 build videos. Pre-v1.2.3, players equipped both Hooks of Heresy and Engineer's default Thermal Harpoons utility, then activated-and-cancelled the painting mode to reset Slicing Maelstrom's cooldown. Hopoo patched it in v1.2.3, so current builds cannot replicate it. If a guide tells you Engineer can spam Slicing Maelstrom infinitely, that guide is years out of date.
Complete the Blockade Breaker challenge by killing 15 bosses in a single run. The Simulacrum is the fastest path if you have the Survivors of the Void DLC, since each enemy in a Boss Wave counts as a separate boss kill. Once Blockade Breaker completes, all four Heresy items unlock simultaneously.
No. Charging only increases the projectile's launch speed, not its damage. The skill always deals 875% damage per second during flight and 700% on explosion regardless of how long you charge. For close-range targets, do not charge at all so the slow projectile lingers on enemies for the full damage tick window.
Usually no. Stacking does not increase Slicing Maelstrom's damage. It only extends the Lunar Root duration by 3 seconds per stack, while the cooldown gets worse by 5 seconds per stack. The cooldown penalty almost always outweighs the longer root, so a single Hooks of Heresy is typically the optimal hold.
Roughly 3,325% damage potential per cast: 875% damage per second for 3 seconds (2,625% total) plus the 700% explosion at the end. This assumes every damage tick connects, which requires the projectile to remain on top of enemies for the full flight duration. Against tightly grouped waves at close range, you will hit close to the maximum.
Loader (loses her Charged Gauntlet grappling-hook engine), Railgunner (loses Concussion Device crit setup), and False Son in Seekers of the Storm DLC (loses his Lunar Spike consumption mechanic). Each of these Survivors has a secondary skill that defines their entire kit, and replacing it with Slicing Maelstrom is a net damage and mobility loss.
Engineer's turrets inherit his items, including Hooks of Heresy. Each turret gains Slicing Maelstrom as its M2, which means you and both turrets can fire concurrent Slicing Maelstroms. This effectively triples the build's damage output. Note that the pre-v1.2.3 Thermal Harpoons cooldown reset bug has been patched and no longer works.
Yes. Lunar Pods drop one random Lunar item per pod for 1 Lunar Coin. Hooks of Heresy will appear in this pool after you have completed Blockade Breaker. The Bazaar Between Time Lunar Buds (2 Lunar Coins each) offer better volume since 6 to 8 Buds spawn per Bazaar visit. The Artifact of Command lets you guarantee Hooks specifically by selecting it from the menu.
Yes. Holding all four Heresy items at once (Visions, Hooks, Strides, Essence) transforms your Survivor into the Heretic. Missing any one item leaves you as your original Survivor with the corresponding skill replaced. The transformation only triggers when all four are active simultaneously.
If you like deep dives on one roguelike, you will probably like the rest of the library. Here are the hub pages and the most popular genre roundups on Rogue Ranker.
Wiki citations: Hooks of Heresy, Heretic, Blockade Breaker, Fandom Hooks of Heresy.
Sprites and item icons sourced from the Risk of Rain 2 Wiki (riskofrain2.wiki.gg) under CC BY-NC-SA 3.0.