

The humming map-maker who sells you 11 area maps and runs the Dirtmouth shop with Iselda.
The hum is the canonical Cornifer tell. Per the wiki, his humming can be heard from a few rooms away in every zone where he sells a map. Scattered loose papers on the ground lead to his exact position. Both audio and visual cues mark his location before the Knight ever sees him.
The exception is Deepnest. According to the wiki, Cornifer does not hum in Deepnest because he is visibly afraid for his life and does not want to give his location away to the beasts. The wiki specifies this as the only zone where the standard tell is absent, making his Deepnest map the hardest one to find by sound.
His Dirtmouth shop is the second half of the system. The wiki notes that Cornifer's wife Iselda runs the surface shop. The Knight buys the area map from Cornifer in the field, then returns to Iselda to buy quills, pins, compasses, and additional map upgrades. The two are a paired service: he discovers, she sells.
This guide covers the 11 area maps Cornifer sells, the humming tell, the Deepnest silence exception, the Iselda marriage and shop dynamic, the Ancient Basin scene where he mentions worrying his wife, and the canonical retirement to the Dirtmouth shop loft bed after all maps are sold.
Cornifer, the cartographer mapping Hallownest. Husband of Iselda in the Dirtmouth map shop. follow the humming and the scattered papers. He sits in a specific chamber in every map-able zone.
 no humming in Deepnest. He is afraid of the beasts and stays silent. Visual paper trail still works.
 Dirtmouth shop loft bed. Once all maps are bought (or available at Iselda's), Cornifer retires to the shop.
Cornifer is a cartographer. Per the wiki, his entire life's work is mapping the entirety of Hallownest. The wiki specifies that when Cornifer was first hatched, he wandered off right away, leaving his siblings and mother behind, which the wiki frames as the early sign of his exploring temperament.
According to the wiki, Cornifer moved to Dirtmouth with Iselda as soon as he could. The two were partners before they were Hallownest residents; the move to Dirtmouth was a joint decision to be close to the kingdom they wanted to map. The wiki frames their dynamic as the rare healthy NPC marriage in the game: shared purpose, complementary skills.
The wiki notes that Cornifer is one of only a handful of NPCs whose dialogue updates significantly across the playthrough. Most NPCs stay in one location with one or two dialogue states. Cornifer changes location with every area, updates his lines based on the Knight's map purchases, and finally retires to the shop with a specific ending dialogue.
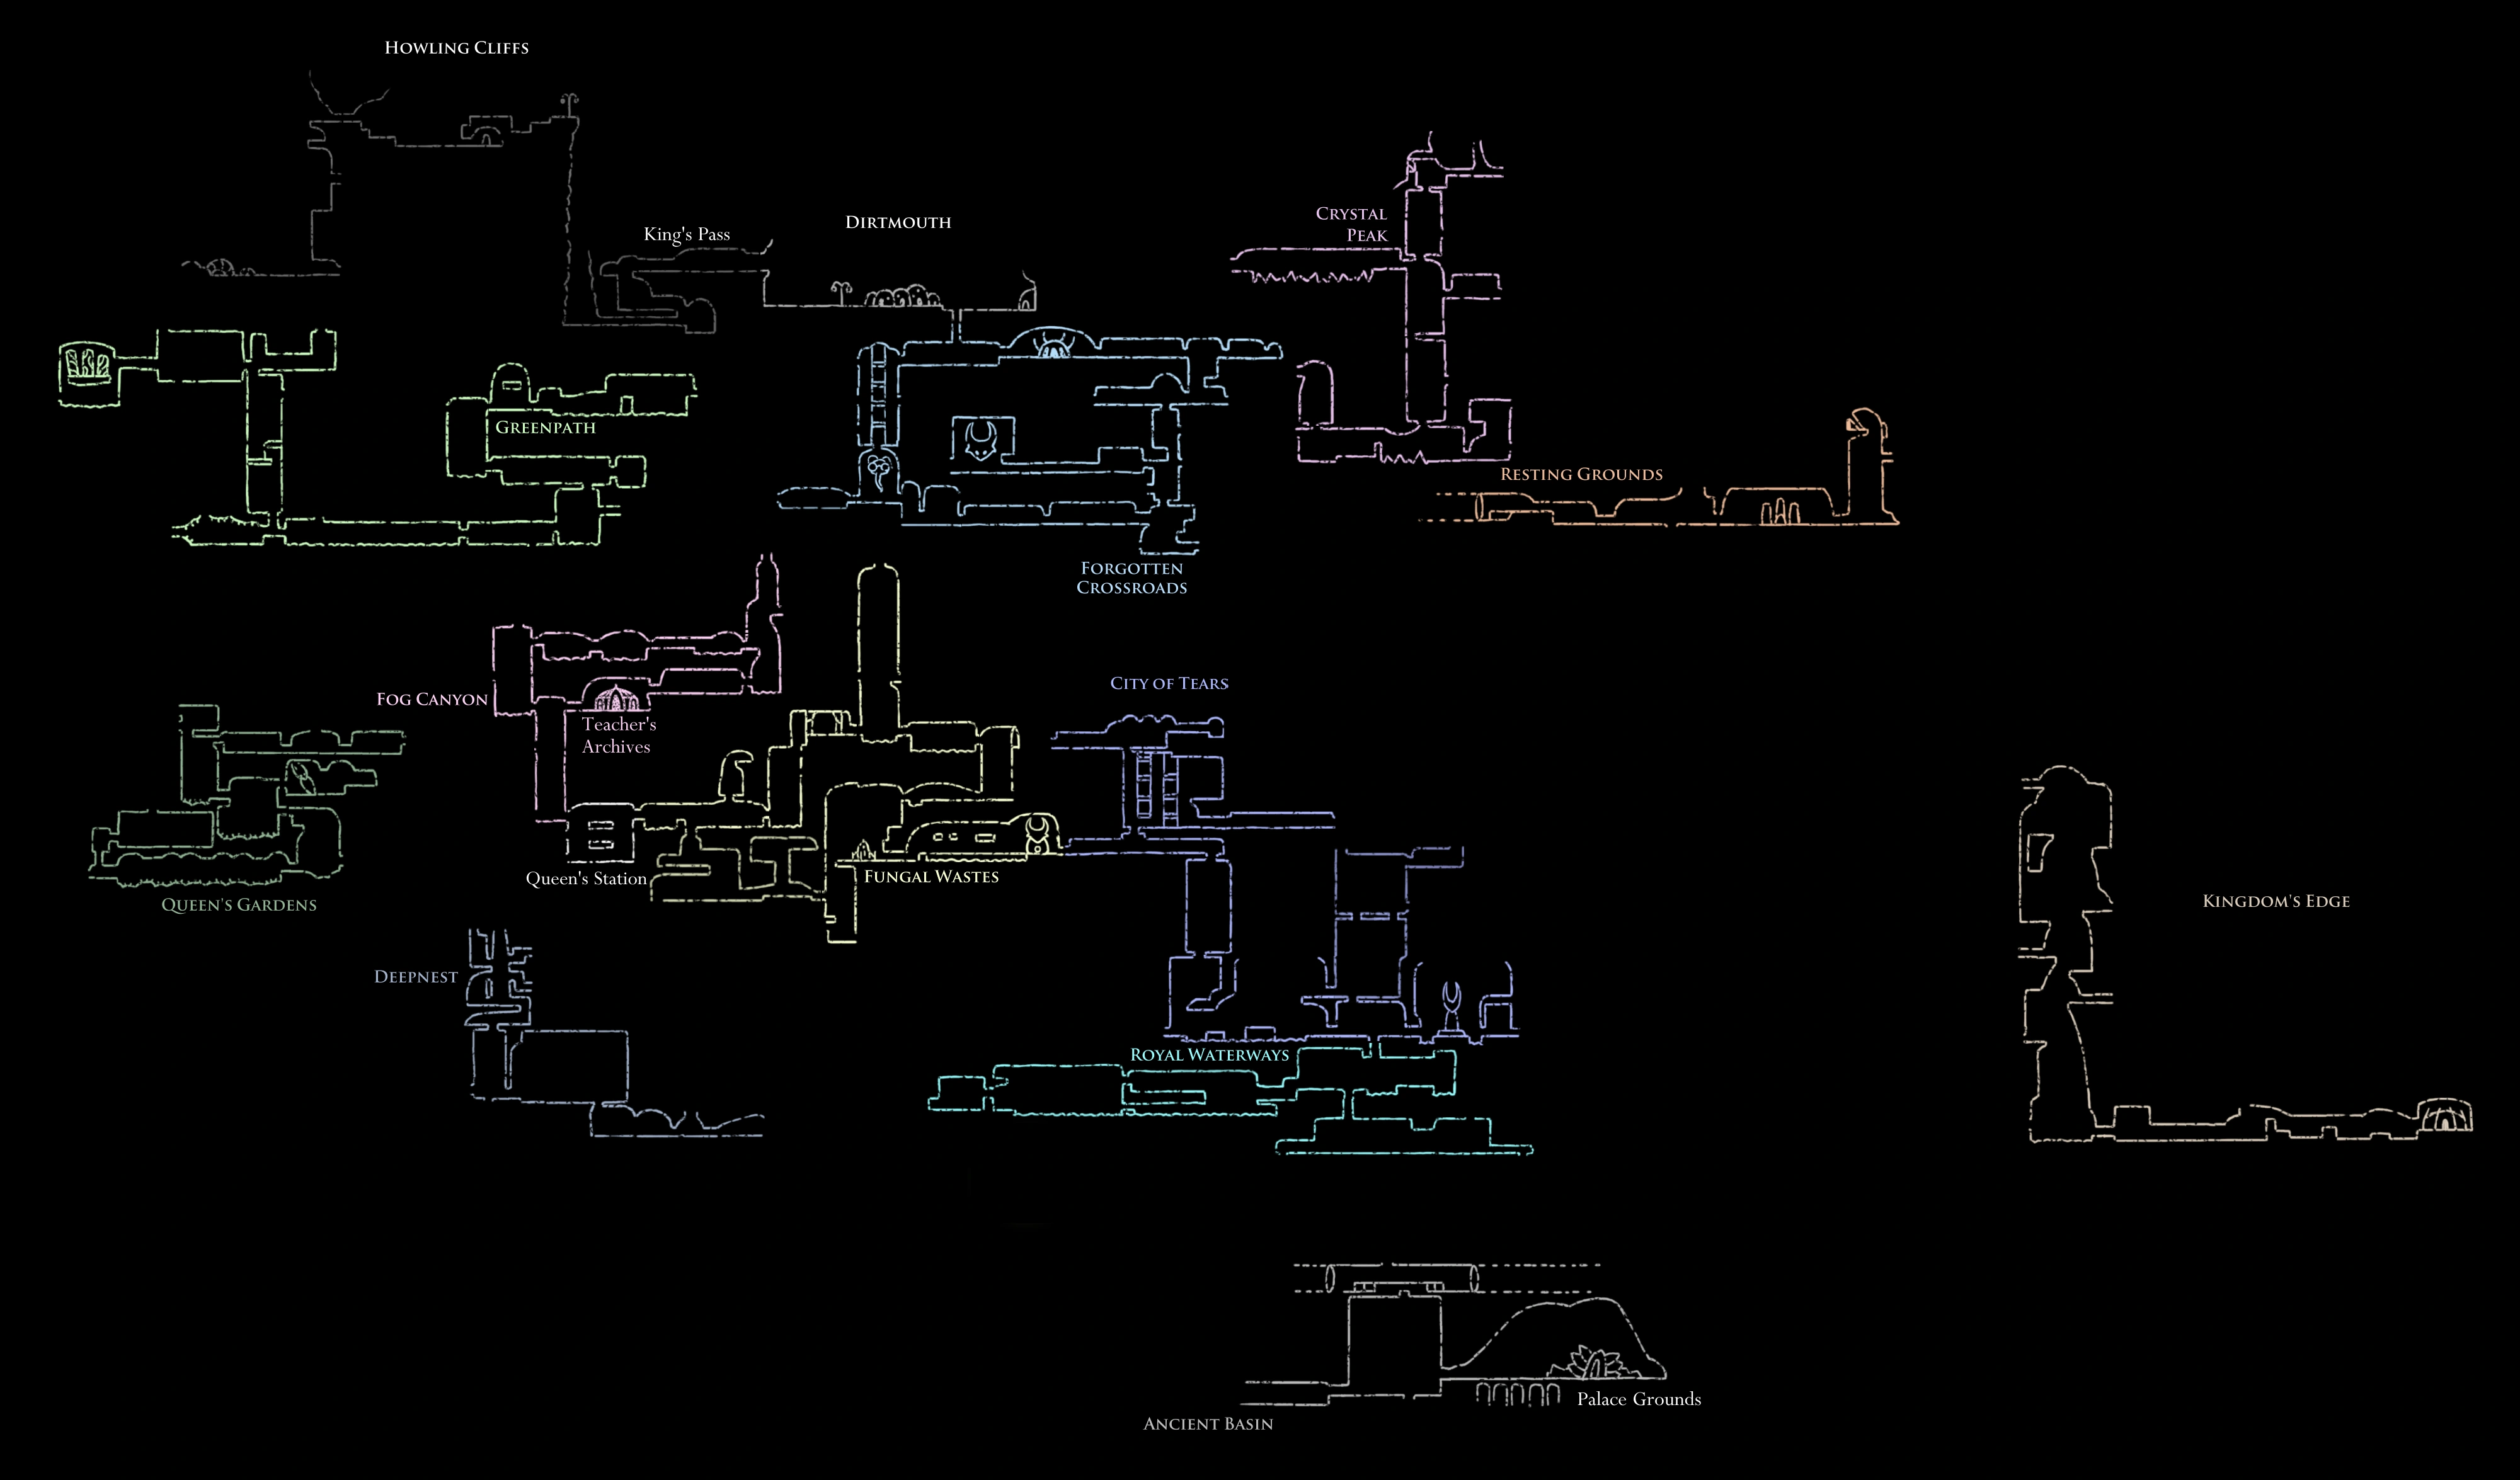
Cornifer sells one map per major zone. Per the wiki, the standard count is 11 maps for the base game (some zones, like the Abyss and White Palace, have no Cornifer maps; the Knight maps them through the Quill alone or not at all).
| Zone | Rough Cornifer location | Map price (Geo) |
|---|---|---|
| Forgotten Crossroads | Sitting room near the Vengefly nest | 50 |
| Greenpath | Small chamber on the upper right | 60 |
| Fungal Wastes | Mushroom chamber near the Mantis Village fork | 75 |
| City of Tears | Sheltered alcove off the main rain hall | 120 |
| Crystal Peak | Mining chamber near the central elevator | 112 |
| Royal Waterways | Dry alcove above the acid channels | 75 |
| Howling Cliffs | Just past the bench near Mato's hut | 60 |
| Fog Canyon | Sheltered nook between Uoma chambers | 75 |
| Queen's Gardens | Off the central clearing, before Mantis Lords path | 90 |
| Kingdom's Edge | Sheltered ledge on the windswept lower path | 112 |
| Deepnest | Hidden chamber off the main spider tunnels | 112 |
Per the wiki, the Ancient Basin map exists but is sold by Iselda at the Dirtmouth shop only; Cornifer never sets up a chamber there. The wiki notes that this is canonically because the Ancient Basin scene (see below) shows Cornifer worrying about his wife and heading home, implying he chose to skip Ancient Basin and pass the data to Iselda for sale at the surface.
Cornifer's humming is the canonical audio cue. Per the wiki, the hum can be heard from a few rooms away in every zone where he is set up. The audio mix makes it directional: louder in the direction of his chamber, quieter as the Knight walks away.
According to the wiki, scattered loose papers on the ground lead visually to his chamber. The papers are pale white against the darker textures, easy to spot once the player knows to look. Both cues (audio + visual) are present in every zone except Deepnest.
The wiki specifies that the humming changes its melody slightly depending on the zone. Most players do not notice the variation across a single playthrough; the wiki documents the audio file differences for completionists. In actual play, the audio cue is consistent enough that players develop an ear for it after the first one or two maps.
Deepnest is the only zone where Cornifer does not hum. Per the wiki, he is visibly afraid for his life there and does not want to give his location away to the beasts. The wiki frames this as the most character-revealing moment in Cornifer's arc: the explorer has limits, and Deepnest is past them.
According to the wiki, the Deepnest Cornifer chamber is in a hidden alcove off the main spider tunnels. Players have to find him by paper trail alone, which is significantly harder in the dark Deepnest lighting. The wiki notes that many players find Cornifer last in Deepnest, after every other map is bought.
The wiki specifies that Cornifer's Deepnest dialogue is the longest in his entire repertoire. He talks about wanting to leave, worrying about the Spider Tribe, and asking the Knight whether the paths back to safety are clear. After buying the map, Cornifer returns to Dirtmouth on his own timeline. He is not seen in Deepnest on subsequent visits.
The Dirtmouth map shop is Iselda's domain. Per the wiki, Iselda sells quills, pins, compasses, marker upgrades, and the maps Cornifer has not gotten around to setting up in person. The Knight buys most of the navigation kit from her rather than Cornifer.
According to the wiki, Iselda's dialogue references Cornifer frequently. She mentions worrying when he is late, expresses relief when he returns, and comments on the maps he has brought back. The wiki frames their dialogue as the most realistic NPC marriage representation in the game: domestic concern, shared pride in the work, occasional friction over his risk-taking.
The wiki specifies that Iselda is also the source of the Wayward Compass charm, the Quill upgrade for ink, and the pin set for map markers. Players who skip her shop end up navigating Hallownest with only the basic area maps and no fast-travel readability. In real runs, the Wayward Compass alone makes mid-game traversal significantly easier.
Cornifer eventually retires to the Dirtmouth shop. Per the wiki, once all maps are bought from him (or available for purchase in Iselda's shop), Cornifer is found sleeping in a loft bed at the back of the shop. The Knight can return to see him there for the rest of the playthrough.
According to the wiki, the Ancient Basin scene foreshadows the retirement. After buying the Ancient Basin map (sold by Iselda, not Cornifer in the field), the Knight can find Cornifer in the Basin briefly. He says he doesn't want to worry his wife and should head back up to the shop soon after a short rest. This is the wiki-quoted line that confirms his decision to wind down the mapping work.
The wiki notes that Cornifer's loft bed sleep state is one of the few unambiguously happy endings in Hollow Knight. Most NPCs die, fall to the Infection, or remain at risk through the credits. Cornifer finishes his life's work, returns to his wife, and goes to sleep. The wiki frames this as a deliberate counterweight to the kingdom's tragedy.
Cornifer's arc connects to Iselda, the Dirtmouth shop system, and the Hallownest map mechanic. These spokes pick up the related threads.


Game data and screenshots adapted from hollowknight.fandom.com, used under CC BY-SA 3.0. Original content remains the property of the wiki contributors and Team Cherry.